Tuesday, June 4, 2013

1830s Trowsers, or Drawers

Women and children, avert your eyes. I'm making underwear!

The directions for these are again straight out of the Workwoman's Guide. They fit just fine except that the waistband is a little short - there's a big gap in the back. It laces to fit so I suppose it's not really a problem, but it might be nice to eventually fit a new waistband so I don't have so much space in back.

As with most of the directions, these are measured in nails, and start with squares and rectangles. The first diagram shows how to turn a folded rectangle of fabric into the shape it needs to be. I did this by measuring and putting a pin at each of the relevant points. I then folded the fabric between the two pins - for instance, to get the angled line at BG (Fig 20) I put a pin at B, one at G, and folded the fabric between the two pinned points. After making a crease I then cut along the crease. Easy as pie.

One thing to note is that this section of the Workwoman's Guide describes these undergarments as either "trowsers" or "drawers." They seem to be somewhat interchangeable, except that the descriptions tend to call the ones for women and children trowsers, and the ones for men drawers. I'm not sure if that's standard or if it's just what the author felt like doing.

Below you can see the beginning of the shape taking place. I measured wrong and ended up with fabric just a little too narrow, so I added little corners onto the two points. Not a problem at all with the finished drawers:


The triangular piece is added on separately, and only attaches to the back half of each side. This is before I've cut the addition to size, and I'm simply lining up the angle:

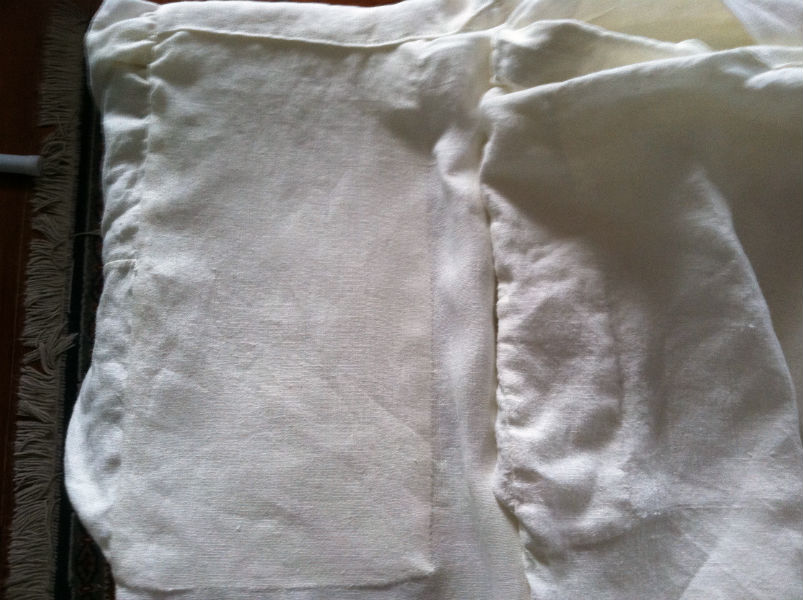
And here I've attached it with a flat felled seam (all of the seams are 1/8" flat felled seams):

You can see now the two legs sewn together, and the two triangular extensions attached:

Finished! Seriously, these were pretty easy to put together so I don't have a lot of in-progress photos. Any open hem (the front fly area and the back gusset, for instance) are finished in a rolled hem. The bottoms of the legs have tape sewn into them for the linen drawstrings. I wove the back lacing on a lucet.

This is the gap in the back. It might show off a nice plumber's crack, but at least they'll stay on my waist. As you can see the backs are gathered into the waistband, so if I do re-work the waistband I'll have the spare fabric to make it longer.

A close-up of the linen buttons. The directions said to use "metal buttons" so I used 3/8" brass rings and covered them in linen. The front fly doesn't get any closure, but the overlap is enough to keep it shut. I hope.

Friday, May 3, 2013

1830s Shirt: Part 2

I'd just like to make a quick note about thread. For this linen shirt I'm using linen thread (60/2 weight). I have 8 needles that I thread up at a time, which gives me an hour or so of sewing. Yeah, I'm slow, but that also includes matching up seam lines and things. I cut 8 threads, each about two feet long. I don't really measure, but line them up from the edge of the table to one of the lines of the boards. Once I've cut them, I wax each thread with the lump of beeswax you see below. I gather the threads and fold them in a piece of paper, and then iron the paper on about the wool setting. Not too hot, but enough to melt the wax into the thread. That makes the thread stronger, and keeps it from knotting up too much as I sew.


Then I thread each needle and stick it in my pincushion, ready to sew.

Here I'm preparing the sleeve for gathering. At first I was using white basting thread, but found it difficult to see the first row of stitching so I could match it with the second row.

So I switched to blue basting thread. Much easier.

Here's the cuff, all set in. For the record, the above pictures are of the sleeve head, not the cuff.

Check out that 1/8" flat felled seam - yeah!

Finally, to finish the shirt I sewed in the bosom piece, also called the lining in The Workwoman's Guide. This piece was measured to exactly fit the sleeve hole, and when I fell stitch the fabric tends to creep. Because in my mind this is "just a shirt" and not a "tailoring" project I didn't take time to baste the lining in place before sewing it. So the ends didn't match up. No problem, I just folded over the bit of exposed seam at the bottom of the sleeve gusset and flat felled it.

Finished shirt! This falls to my knees, which the directions call for.

Since I already made my Regency shirt in a similar style, I called this one #2. You can see the embroidery in the above photo as an out-of-focus red smudge at the left hip gusset.

The collar and cuffs got buttons and buttonholes. The directions don't call for any particular kind of button, so I chose bone.


Now, as for differences between this shirt using the directions from The Workwoman's Guide, and the Kannik's Korner pattern. They are very very very similar. I believe one of the sources for the Kannik's Korner pattern was an earlier edition of The Workwoman's Guide. The neck gussets in this version are single-sided, unlike the ones in the Kannik's Korner pattern. That means it leaves some exposed seams at the underside, which I cross-stitched as you can see below. This may become a problem, and I might have to insert a second gusset later if I notice it fraying. This is the only exposed seam on the shirt.

You can see the difference in collar height. Kannik's Korner pattern on the right.

The bosom lining in this pattern is much wider (again, Kannik's Korner on the right). I can see why it's referred to as a lining in The Workwoman's Guide.

Sorry I switched sides. This time the Kannik's Korner pattern is on the left. In that pattern the ends of the shirt match front and back. In The Workwoman's Guide the front is one nail shorter than the back.

Those are the only real differences! The directions in The Workwoman's Guide are in a different order than the sewing directions from the Kannik's Korner pattern, but it doesn't really matter which you use. I referred to the Kannik's Korner directions from time to time because they're written more clearly, but they're basically the same.

Next time, drawers....

Tuesday, April 23, 2013

1830s Shirt: Part 1

I've taken the directions for this shirt directly from The workwoman's guide: containing instructions to the inexperienced in cutting out and completing those articles of wearing apparel, &c. which are ususally made at home : also, explanations on upholstery, straw-platting, bonnet-making, knitting, &c. That's quite a mouthful for a title! I'll just call it The Workwoman's Guide from now on. This book was published in London in 1838. One thing to mention given that it's an English book: the terms "muslin" and "calico". These terms are exactly the opposite of what they are in American English, for some reason. In the U.S. muslin is a coarser, cheap fabric, and calico is a tightly-woven cotton, often with a small repeating print. In England, calico is the coarser, cheap fabric, and muslin is a tightly-woven cotton, often with a small repeating print. Just something to keep in mind, because The Workwoman's Guide refers to these fabrics.

The directions for shirts begin on page 138, <linked here>.

I've used the measurements for the "man's larger size" on page 139. If you look at the measurements you'll see Yds. and nls. Nls? Yes, there's a new unit of measurement here: nails. Apparently this was a unit of measurement for fabric, and it goes as follows: 4 nails = 1 quarter. 4 quarters = 1 yard. 5 quarters = 1 English ell, and 6 quarters = 1 French ell. Of course the French have to be different. :) That means that 1 nail = 2.25 inches. Simple, right? Well, since all of the measurements from The Workwoman's Guide are given in nails, I figured that instead of converting all the time I would just make a tape measure in nails. My tape is one ell (English) long.


 Okay, back to the shirt. This pattern is very similar to the Kannik's Korner 1790-1830 shirt that I made before, but I wanted to make one according to the directions in The Workwoman's Guide this time. Some of the measurements are very similar, and some are a bit different, and I'll make a comparison when I've finished this shirt.

According to The Workwoman's Guide "Shirts for labouring men are generally made of the stout linen called shirting-linen." I chose a 5.3 oz linen from Fabrics-store.com. Since all the pieces are rectangles or squares, I drew threads to make sure I cut in straight lines.


Modern fabric comes in widths much larger than period fabric, so even though the directions called for using fabric exactly 14 nails wide, I had to cut mine to size. However, given the width of the fabric I was able to get all of my pieces cut from exactly 2 yds, 2 nls of length.


One thing I couldn't find in the pattern list was wrist gussets, which are mentioned in the directions for making up the shirts. Since I think wrist gussets would probably just get in the way anyway, I didn't worry about them.

One thing I found with this shirt that was the same as the Kannik's Korner shirt I made was that the length of the shoulder straps is longer than necessary. I'm guessing that this is just so you can sew them on long and then trim them to the exact length which is better than having them too short:


Here I've gathered the very wide shirt body (18 nails, plus about 1 nail added with the neck gussets) into the collar (8 nails).

With the collar folded down this is starting to look like a shirt!

I've begun to prepare the cuffs for sewing. In order to stitch in a straight line I've drawn threads as guides. You can see the border threads for seams, as well as guides for topstitching.

That's all I've got so far. Stay tuned for more!

Friday, April 12, 2013

Creating an Impression: An 1830s Outfit, Part 2

In the last post I introduced my visual mentor for this project, William Sidney Mount. Once again, I'm just going to be concentrating on his paintings from the mid-1830s, all of which depict "regular" folk, instead of the fashionable sort.

I'm taking all of my images from the page on Mount at The Athenaeum.

First of all, instead of putting all the full images up on this page, let me link to the ones I'll be examining:

Long Island Farmer Husking Corn, 1833-1834
The Breakdown, 1835
The Sportsman's Last Visit, 1835
Bargaining for a Horse, 1835
Courtship, 1836
Farmers Nooning, 1836
The Long Story, 1837
Raffling for the Goose, 1837
The Painter's Triumph, 1838

For a full outfit, I'll need a shirt, trousers, waistcoat, cravat, coat, hat, shoes, and topcoat. Let's start taking a look at what is shown.

Shirt

All white, except for the red shirt in The Painter's Triumph. I'll be making one based on the directions in The Workwoman's Guide (the Guide also has directions on how to make men's drawers, which I'll also use). The Guide suggests that "Shirts for labouring men are generally made of the stout linen called shirting-linen.... Shirts for men of lighter occupations are sometimes of calico, with linen collars and wristbands. Blue checks, unbleached, and striped calicoes, or prints, are used for that purpose." So for my shirt I'm going to use stout plain white linen. The pattern will be similar to the Regency shirt I have already made.

Trousers

These seem to come in four colours: buff, brown, grey, and black, some plain and some with pinstripes. Almost all of the examples in the paintings are fall-front trousers, also similar to the Regency trousers I've made. There are a few exceptions: the eponymous Sportsman is wearing fly-fronts, and it looks as though the Long Island Farmer and the Painter are both wearing trousers with enough pleats in the front to think they are Cossack trousers (which also have fly-fronts). I'm going to go with the fall-front trousers, because even at the time W. D. F. Vincent's Cutter's Practical Guide was published in the 1890s it indicates that working class trousers still fastened in the whole fall style.

Waistcoat

One interesting thing I noticed is that a good proportion of the backs of the waistcoats shown are red. Even the grey-backed one in Farmer's Nooning looks as though it is lined in red where the lining shows at the bottom and armscye. They tie to fit, instead of buckling, and most are single-breasted notch-collared. The range of colours is greater, but most are brown or black, then some buff and cream, and one red (that Sportsman is throwing things off, with his red double-breasted waistcoat).

Cravat

Red is the dominating colour here, with black a close second. White and yellow also appear. Some have tied the ends into a bow, and some leave them hanging loose. The Long Island Farmer wears a small cravat, with very short ends.

Coat

It seems, through these paintings, that when you're not hot enough to wear no coat at all, you're so cold that you wear a heavy coat with a fur or fleece collar. Seriously, these look like some warm coats. Of course, some are probably topcoats. Black or buff frock coats seem to be the norm, with black cutaway coats being worn by the fancier gentleman in the Sportsman's Last Visit (poor Sportsman looks like he's not fancy enough to get the girl), the Painter, and the fellow who looks like he's having trouble staying upright in his chair in The Breakdown. The cut looks similar to my linen frock coat, but these are definitely all wool.

Hat

I'm enamoured of the battered and bashed top hats in these paintings. Even though there are other hats depicted (there's a good range of hats in the Raffle) I'm going to do a top hat and beat the heck out of it.

Shoes

All black leather, the best picture is from Farmers Nooning. A low boot, very similar to a modern dress boot. I'm not sure what I'll do here to be the most period correct. I know there are shoes for reenactors out there, but I might also get away with a modern boot.

Topcoat

Like I said before, it looks as though there are a lot of topcoats here. There's also a cloak or two, or perhaps an Ulster with a cape.Fur or fleece collars makes them warmer, and the one in The Long Story nicely shows the pad stitching under the collar. Most of the coats are buff, with a brown double-breasted coat with frogs in Raffling for the Goose (along with a red-lined green cloak or Ulster). The coat in Courtship has nice contrast piping on it, and there's a dark cloak in The Long Story. I'll probably go with a buff wool topcoat with fleece on the collar.

Well! That was a lot of words without too many pictures on my part, but I hope you had fun referring to the paintings while I rambled on. Next post will have me actually making something, I promise!

Thursday, April 11, 2013

Creating an Impression: An 1830s Outfit

Up until now I've mostly focused on the later part of the Victorian era, tending toward the '80s and '90s. However, in about a year (and yes, apparently you need to book a spot that far in advance) I will be attending a dinner cook-along at Old Sturbridge Village with my wife, my sister, and brother-in-law. I thought it would be a fun idea to dress up for it.

If you aren't familiar with Old Sturbridge Village, it's a living history museum in central Massachusetts. The village consists of 40 or so restored buildings, and costumed interpreters performing the crafts and daily activities of the early 19th century. Even though the web site states that the range of the village is 1790-1840, it seems that most of the clothing is from the mid- to late-1830s (I know that one of the primary sources for clothing is the 1838 Workwoman's Guide).

Dandys, 1830
from Wikipedia Commons
Men's fashion, 1837
from Wikipedia Commons
Jacket and trousers, 1825-1830
from Les Arts Decoratifs

Cossack trousers, 1833
from The Metropolitan Museum of Art
The problem with researching clothes from the 1830s is that most of what you can find (at least online) for pictures are of fashion prints and clothes from museums. These are great if you want to recreate a dandy or gentleman, but if you want someone who will fit in at a farming village - that is, something beyond the wasp-waisted (and probably corseted) man in Cossack trousers with stirrups, you need to look a little further. I discovered the paintings of William Sidney Mount.

Mount lived from 1807 to 1868, and became famous for depicting scenes of everyday life. In particular to my interests, many of those paintings are from the mid-'30s. Now that's what I'm talking about! Next time I'll go over some specific points about the outfits, and make a list of what I'd like to make for this outfit, in a running series. Until then, I'll leave you with some pictures.

The Breakdown
William Sidney Mount, 1835
from The Athenaeum
Farmers Nooning
William Sidney Mount, 1836
from The Athenaeum
Raffling for the Goose
William Sidney Mount, 1837
from The Athenaeum

Wednesday, April 3, 2013

Award Night


Well I'll be! I'll have to admit that until my last post I wasn't even sure if anyone was actually reading my blog, so now I'm even more flattered to receive the Very Inspiring Blogger Award nomination from Marijke. She commented on one of my first posts, so I know she's been following along for a while.

In order to accept this award, there are some rules:

  • Display the award and link back to the person who nominated you.
  • State 7 facts about yourself.
  • Nominate 15 bloggers for the award.
  • Notify the winners.

I guess I'm a little confused about the last one. Does that mean notify the 15 bloggers who you've nominated? I'll go with that.

Seven Facts About Myself
  1. I'm a cocktail geek (some might say snob). My favourite cocktail is the old fashioned, but the old fashioned old fashioned, not the horrible thing that developed in the 1950's. I'm talking about the one that appeared in 1862 in the first bartender's guide ever, written by Jerry Thomas: sugar, bitters, and whiskey, over ice, with a twist of lemon. No muddled fruit. No soda water. Just sugar, bitters, and whiskey. Yum.
  2. I've hiked all 2,100 miles of the Appalachian Trail, all 2,600 miles of the Pacific Crest Trail, and over 2,000 miles of the Continental Divide Trail. That's a total of a year and a half of living outdoors every day, sleeping either in a tent or under the stars.
  3. I wore a kilt for three years, eschewing trousers.
  4. Although I reside in Boston, MA, I've lived in England (W. Yorkshire) and France (Alpes-Maritimes and Ariège) as well as spending two months traveling around Ireland.
  5. My wedding was steampunk-themed (though if you read this blog you probably already know that).
  6. I've been brewing beer for nine years, and although I mostly concentrate on English session styles, my favourite, and the one I've brewed the most, is a black pepper saison.
  7. I sew things other than Victorian outfits. I should probably start a side blog for my modern clothing....

Nominate 15 Bloggers for the Award

Blogs by men, detailing men's sewing and tailoring:
  1. Drunktailor - With a blog change it's hard to keep up with the Drunk Tailor! But I like his goal of producing clothing that the masses would have worn, not the elite.
  2. Passion for the Past - Ken participates in living history in Michigan, concentrating on the Civil War era. I like that he and most of his family portrays civilians. There are plenty of military reenactors.
  3. For the Love of History - Jim not only makes reproduction clothing based on the Gold Rush era of California, but also recreates many of the personal objects of the people of that time. I'm in awe of his skills.
  4. Williams Clothiers - Although the site is a storefront for James Williams' period tailoring service, he also makes posts about drafting patterns and other costuming thoughts, and the gallery is drool-worthy. I've never seen so many photos of pad stitching in one place.
  5. Male Pattern Boldness - What can I say about Peter that hasn't been said already? A sewing ambassador.
  6. The Japanese Pattern Challenge - A blog started to publicly learn to sew, Mainelydad has long since done so, and has raised the bar to try new and exciting things. There are also one or two Victorian-style projects on his site.
  7. TaylorTailor - Taylor wanted a pair of jeans, so he learned to sew, then he learned to draft his own patterns, and then he opened a shop selling hard-to-source denim and jeans-related hardware. It's great to see someone who isn't afraid to jump in and figure something out for himself.
  8. See Jason Sew - I only wish we could see Jason sew more often - he doesn't update often, but when he does it's worth it.
  9. Rory Duffy Handcraft Tailor - It's no longer amateur hour, folks. Rory is a Savile Row-trained tailor, and is gracious enough to let us look at photos of his work and process.
  10. Davide Taub - Another professional, Davide works in Savile Row. His cutting style is non-traditional to say the least, but it pays homage to the past, and you can see the early 19th century in many of his pieces. I also love the secret embellishments he puts under the lapels of many of his jackets and coats.
Other great costuming blogs, even if they aren't about men's clothing. :)
  1. Diary of a Mantua Maker - All of ColeV's clothing is amazing, but look at that steampunk outfit! Just look at it!
  2. At the Sign of the Golden Scissors - Hallie Larkin knows what she's talking about when it comes to 18th century clothing. It's a little before my preferred time, but I keep going back to learn more.
  3. Before the Automobile - I'm just in awe here. Augustintytär doesn't just make beautiful clothing and then take a couple pictures of it - you get to scroll through pages and pages of photos with the Finnish countryside as the backdrop.
  4. The Fashionable Past - With all the great sites on costuming for women in the 19th century out there, this is one I keep coming back to. This recent robe a l'anglaise series is one of my favourites.
  5. 19th Century Costuming - or HistoricalSewing.com - I'm not sure which title Jennifer Rosbrugh likes to use. Whichever one it is, this blog is packed full of tips and information, as well as photos of her clothing.
That took a long time to write up! Think of all the tailoring I could be getting done!

Sunday, March 24, 2013

Frock Coat 4: Finished

Finally, I'm posting about the finished frock coat! I actually finished a while ago, but what with other projects I'm working on (non-Victorian clothing) I haven't gotten around to posting these or putting on the finished frock coat for a photograph.

Here I'm sewing the collar front to the collar back (the back has all the basting showing below. The stitch pulls the edges together into one piece, as you can see. The front slightly overlaps the back, which the stitch then sort of wraps down to join. Does that make sense?

The finished collar, and revers. The draft I used had a dart to shape the revers, which I'm not entirely sure about, but you can see it where it meets the collar below.


The sleeve joining the body at the shoulder. There are no shoulder pads in this coat, but there are sleeve heads. I think this is a nice smooth join, without too much fuss. It was a lot of fuss to make it work.

The waist buttonhole is worked into the seam between the body and the skirt. There are bar tacks (which you can't see, apparently) strengthening the ends of the buttonhole.

Finishing a buttonhole. You can see the length of four-cord I made of twisted buttonhole silk. Just four strands of thread twisted until they twist themselves into a rope.

The finished buttonhole.

I've basted the buttonhole closed to work on the next one. I'll leave this basting in place until I've pressed the fronts one last time.

All dressed up. You've seen me make this shirt, trousers, waistcoat, and frock coat.

The trousers need a serious pressing. Oops.

 I'm not sure what's going on with the shirt collar here. The frock coat looks a little bunchy too, but that's because it isn't buttoned up. When it's buttoned it's a perfect fit - a true body coat.