This cap has two uses. The first - and whence the name - is it is what men would wear when they would smoke their cigars or pipes, in order to keep their hair from smelling smokey. This is also the idea behind the smoking jacket - something to keep your clothes smelling fresh. However, since I have (and many men of the time had) a moustache, there really isn't a lot you can do to keep from smelling smoky. Once you've smoked, if you try to kiss your sweetie she'll know. ;)
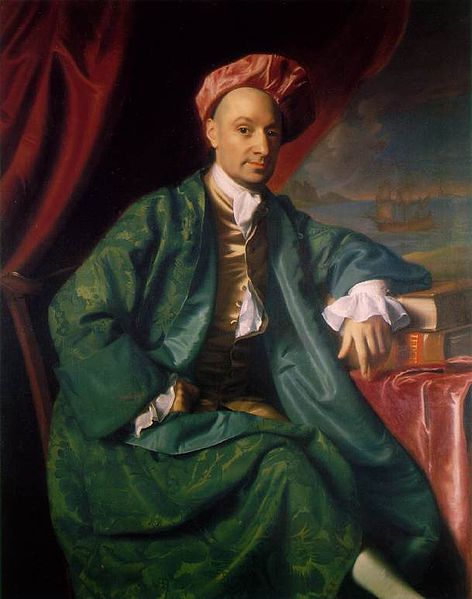
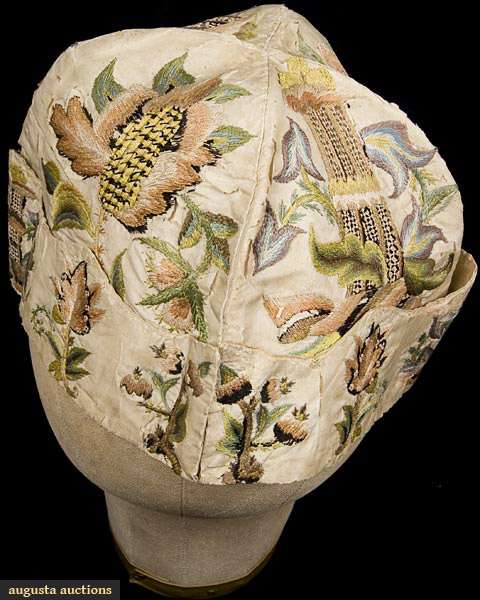
The other reason, and I think where the hat probably came from originally, is simply that without central heating it was cold in most houses, and you needed something to wear on your head. Not too formal - save the top hats and bowlers and homburgs for out-of-doors - but to wear in your own home you'd have a smoking cap, and a smoking jacket to wear along with it. These are really holdovers from an earlier time when men would wear a banyan:
 |
| Ward Nicholas Boylston in a brilliant green banyan and a cap, painted by John Singleton Copley, 1767. From Wikipedia. |
 |
| From: Modemakt/Power of Fashion Blog |
 |
| From: Augusta Auctions |
These would eventually change to more of a fez/pillbox shape for the Victorian smoking cap.
There are plenty of links online to patterns for smoking caps from Godey's Magazine (sort of a Victorian version of Better Homes & Garden and Vogue, mashed together), but most of them are appliqué or couched cord and braid. I wanted to embroider my pattern, so I found (what I thought was) a simple motif, and repeated it three times on a piece of paper the diameter of my head. I figured that three inches tall looked about right.
I then used that paper as a pattern to cut out a length of heavy wool broadcloth - this is probably 28oz melton, definitely coat-weight - and a strip of linen backing. In the end I really didn't need the linen, but it helps the inside look neat. I cross stitched the wool to the linen.
I then basted the paper with the motifs onto the wool, and back-stitched around all of the borders. If I did this again I'd use stem stitch instead, for a fuller, more raised border, but at least that transferred the pattern to the cloth. I then tore away the paper, picked out the little bits from underneath the stitches with a pair of tweezers, and was ready to embroider.
Almost all of the embriodery is padded satin stitch. Some of the leaves are herringbone stitch, and the purple tips of the white flower are French knots. This wasn't simple. All told, it took at least 40 hours to embroider all three motifs.
As you can see from the back, I tried to keep the amount of embroidery floss used to a minimum.
And the finished cap. The button is a metal washer covered with the same wool.
Now, having shown all that, let me just say that making a smoking cap is not tailor's work. You might have been able to purchase one pre-made in a haberdashery, but most often I believe they were made by a wife for her husband. There's a reason so many patterns show up in Godey's ladies magazine. However, from the amount of work it takes to embroider such a cap, it's no wonder that most of the patterns are for couching and appliqué - those methods are much faster!


