Monday, December 9, 2013

1830s Vest: Finished

It's been far too long since I've posted - sorry! A couple big projects took up most of my time, but now I'm back, and the vest is finished.

When I left off, I had added the facings, so now it's time to work on the lining. I apologize, because the red of the lining is hard to colour-balance. It's really a brick red, but it's polished cotton so it shines a little bit. If you recall from the pattern, there was a quilted section in the chest. I've outlined the area with tailor's tacks, and in the back I add a little bit of wool batting: 

Over the top of the batting I basted a circle of thin linen. This has a 1/4" seam allowance to match with the encircled ared:

After quilting, the front of the lining looks like this:

And the back looks like this. Also, now I've basted the front armscye of the cloth and lining together.

The lining is turned in and prick stitched to the fronts.

A pleat is placed into the lining. If the quilting weren't there the pleat would run the full length of the vest, but now it tapers in and out of the quilting above and below. This pleat allows the vest to curve around my body without pulling at the lining. I've also felled the lining to the facing.

Before attaching the backs, I basted some scraps of linen into them where I'll attach the back stays. This will help keep the stitches from pulling through the fabric.

The back is attached (sorry, no photos of the process), and buttonholes are marked. Somehow I ended up with 7 buttonholes. I didn't really mean to, but that's all right - they all fit.

Basting to hold all the layers in place:

Finished buttons and buttonholes. The buttons are self-covered wooden blanks from Burnley & Trowbridge.

The finished vest. Please do click on these and all the photos to enlarge them to full size.


Monday, September 23, 2013

1830s Vest: Drafting and making up

So where have I been for so long? I've had a couple of other tailoring projects I was (and still am) working on that took priority over historical tailoring. I also moved, out of the big city to the 'burbs. This gives me my own tailoring room! I built a tailoring bench:


I just need some more wood for lower shelves, instead of putting the cloth on the floor. It's the perfect height for drafting, and not too hard to sit on.

Anyway, after the research from the last post I decided to make the vest from buff broadcloth, with a red polished cotton back and lining, and ties to cinch it in back. I used the "Single-breasted roll-collar waistcoat, 1830s-1840s" draft from R.I. Davis' Men's Garments 1830-1900.

 You can see where I'm going to add padding in the chest lining. I also wasn't sold on what kind of cinching I was going to use, and you can see two different tab ideas for lacing. In the end I won't use either of these methods, instead attaching cotton tape to the back as ties.

This broadcloth is pretty fabulous. I ordered it from Burnley & Trowbridge. Here it is after using the iron to shape it. You can see that the cloth doesn't want to lie flat, and in fact has quite a bit of volume now that I've shrunk and stretched various edges:

The back pieces, in red polished cotton (ordered from Payless Fabric). The back pattern piece is cut in two double pieces, for the inside and outside backs.

I used the front piece as a template to cut the canvas for the fronts. In this case since the broadcloth is already pretty heavy I used cotton muslin for the canvas, cut on the bias.

The pockets are done in the same way as I've done before.

Here I've added the collar extension, basted in the canvas, and basted in the edge tape. The tape for the collar roll line is basted in tight, to help keep the collar against the chest. The bottom edge is turned up, and creates its own facing to attach the lining to.

The edge of the button extension turned over and cross stitched to the canvas.

Now I discover a problem. This broadcloth is thick. It's about 1/16" thick on its own. Fold that over, and add a folded over facing, and I'm looking at a front edge that's 1/4" thick! I was worried that this might happen (but not worried enough that I took steps to fix it ahead of time). Enter the beauty of broadcloth - because it's tightly-woven and then felted, you can use a raw edge and not worry about it fraying. This was actually common with period clothing, and I've seen examples of this in person (I don't have any photos though).

I cut off the turn-over of the button extension, and trimmed 1/4" (the seam allowances) off the collar and facing edges. This isn't too pretty where I've already stitched on the edge tape, but I'm not going to take it off. This edge will be underneath the buttoned-up front so I'm not worried about catching a glimpse of the canvas. The buttonhole-side I hadn't done yet, so I trimmed the canvas back before I stitched on the edge tape for that piece.

I basted the facing in place. In the front where it buttons, the facing is just behind the front, and then shifts to be just ahead of the undercollar. Does that make sense? That way, the pieces that will be showing are overlapping the pieces that won't.

After felling the facing in place you can see how it wants to lie - it's not flat. This will (hopefully) form around my chest and neck.

Success! After felling the total thickness of the front edge is just over 1/16".

Saturday, September 21, 2013

1830s Vest: Research

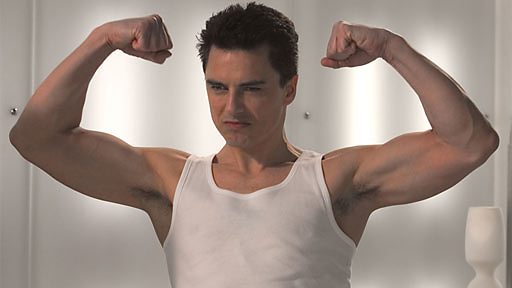
Vest or waistcoat? In this case I'll call it a vest. I'm feeling American today. Which reminds me of the Dr. Who episode where Captain Jack Harkness - ostensibly American - refers to wearing a vest:

That will increase my page views, I'm sure.

But I'm making a vest in the American sense. Most of the images I can find online of 1830s vests are pretty fancy silk affairs. They all have shawl collars. The backs are polished cotton. You can see that there are two different methods of cinching the back - ties and laces.


Now I'll turn to my friend, William Sidney Mount. There are plenty of vests depicted in his paintings. Most of them are shawl collars, though there are one or two notch collars. All but one that I can see are single-breasted, and many have red backs. Quite often they are black, but it seems that when they're shown with a black coat, they tend to be buff. They're all cinched with ties, when shown. The one that you an see inside is lined with the same polished red cotton as the back. They all come to a shallow point at the front waist.

  
  You can see the red lining above right.


Hey look - different paintings, but the two men on the left above seem to be the same! 

A hint of white lining. This is also, I think, the only figure painted by Mount who isn't wearing a white shirt.

Next time I'll start work on the vest itself.

Monday, July 22, 2013

1830s Broadfall Trousers: Finished

It's been a while, but I've finally finished my broadfall trousers! The heat wave we've had for the past two weeks, on top of other projects, has kept me from working on these - there's nothing like sewing with a heap of heavy wool serge in your lap when it's 97 and humid. No thank you.

With the pockets finished, I could sew together the fronts and backs. Here you see everything basted together, ready for sewing the long seams.

You can see here how the added inlays are dealt with. The backs have added material for adjustment and size increases. The inlays are marked with thread tailor tacks, and this line matches with the edge of the fronts. I then know to sew 1/4" inside of that line.

Based on the rear view of these trousers I decided to widen the "V" at the back waist so I can add an adjustment strap. I didn't bother to change the cut, but just folded back more material and pressed. I later shrank out the little ripple of cloth that bubbled up because of the additional fold.

On the outside I made a bar tack to keep the V from tearing open.

Sewing on suspender (braces) buttons, I added a bit of extra linen inside to help support them. I side-stitched the linen in place, then sewed on the buttons.

The bearer buttonholes, in 3 different stages. The top buttonhole is completed and basted shut, the middle one is cut and whipped, and the bottom one is marked out for cutting.

To mark the button placement I lined up the edge of the flap with the blue tailor tacks, then scraped some chalk above the open ends of the buttonholes....

Lifting up the flap, I have my buttons marked out.

After sewing on the buttons, the flap fits perfectly.

The fall buttonholes, marked out. The two corners are done at angles, and the inside ones are vertical.

Halfway through sewing a buttonhole. You can see my homemade gimp - four strands of buttonhole silk twisted together.

All buttoned up! Well this flap isn't going anywhere.

On to the adjustment straps. The white linen backs are cut out the same size as the cloth. When basting them together I made the cloth fit inside the edge of the linen all around. This way when they're turned out the linen will be smaller than the cloth, and there will be a little overlap of cloth all around so the linen doesn't show in front.

The adjustors sewn in place.


Finally two strips of lining fabric are sewn into the waistband. Early 19th century trousers apparently didn't have waistband curtain lining, so this is all I need to finish the trousers.


 The colours are really off in these last two photos. It was night time, and our living room light is very dim. I'll have to get some better photos outside, but for now this will have to do.