
Then I thread each needle and stick it in my pincushion, ready to sew.

Here I'm preparing the sleeve for gathering. At first I was using white basting thread, but found it difficult to see the first row of stitching so I could match it with the second row.

So I switched to blue basting thread. Much easier.

Here's the cuff, all set in. For the record, the above pictures are of the sleeve head, not the cuff.

Check out that 1/8" flat felled seam - yeah!

Finally, to finish the shirt I sewed in the bosom piece, also called the lining in The Workwoman's Guide. This piece was measured to exactly fit the sleeve hole, and when I fell stitch the fabric tends to creep. Because in my mind this is "just a shirt" and not a "tailoring" project I didn't take time to baste the lining in place before sewing it. So the ends didn't match up. No problem, I just folded over the bit of exposed seam at the bottom of the sleeve gusset and flat felled it.

Finished shirt! This falls to my knees, which the directions call for.

Since I already made my Regency shirt in a similar style, I called this one #2. You can see the embroidery in the above photo as an out-of-focus red smudge at the left hip gusset.

The collar and cuffs got buttons and buttonholes. The directions don't call for any particular kind of button, so I chose bone.

Now, as for differences between this shirt using the directions from The Workwoman's Guide, and the Kannik's Korner pattern. They are very very very similar. I believe one of the sources for the Kannik's Korner pattern was an earlier edition of The Workwoman's Guide. The neck gussets in this version are single-sided, unlike the ones in the Kannik's Korner pattern. That means it leaves some exposed seams at the underside, which I cross-stitched as you can see below. This may become a problem, and I might have to insert a second gusset later if I notice it fraying. This is the only exposed seam on the shirt.

You can see the difference in collar height. Kannik's Korner pattern on the right.

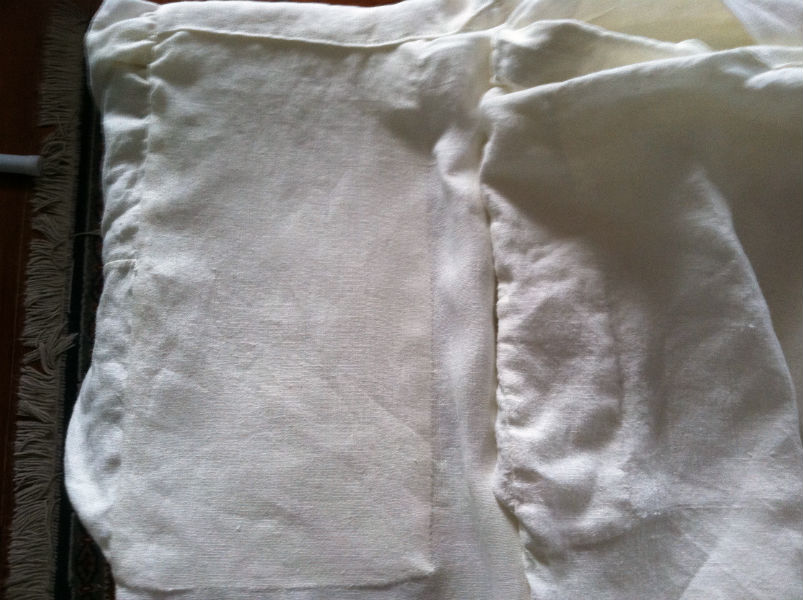
The bosom lining in this pattern is much wider (again, Kannik's Korner on the right). I can see why it's referred to as a lining in The Workwoman's Guide.
Sorry I switched sides. This time the Kannik's Korner pattern is on the left. In that pattern the ends of the shirt match front and back. In The Workwoman's Guide the front is one nail shorter than the back.

Those are the only real differences! The directions in The Workwoman's Guide are in a different order than the sewing directions from the Kannik's Korner pattern, but it doesn't really matter which you use. I referred to the Kannik's Korner directions from time to time because they're written more clearly, but they're basically the same.
Next time, drawers....
Hi, Andrew. Just popping over from Male Patterned Boldness. I've been reading pasts post about the construction of this shirt. I love watching it come together. You're very meticulous!
ReplyDeleteGood morning! This is just beautiful. I am so grateful for the tip about ironing the waxed thread--did you see that somewhere in a historic how-to? So clever! I have never sewn with linen thread, as I'm a costumer, not a re-enactor or historic garment person, but I have often been frustrated with how modern thread doesn't seem to have been made for hand stitching! I have lots of old mercerized thread from my grandma's stash that has a much better hand. But I digress! thanks for the posts about the shirt. So very helpful,
ReplyDeleteNancy N
Really lovely!
ReplyDeletelove to see you again
ReplyDelete