
Thursday, August 30, 2012
How to wear trousers properly

Friday, July 20, 2012
Day Trousers: Part 5 (pockets)
Unfortunately I don't have a lot of photos of the pocket-making process. I have to say I was working on this through the heat wave last week, and what with having a fan pointed at me going full blast - and then having to keep moving the thread that was blowing around in the breeze - I didn't stop to take a lot of pictures as I went along.
Let's start first with a photo from last the last post. You'll see the two unfinished flaps of wool poking out - those are the pocket facings. They're here so that from the outside you don't see any of the pocketing fabric, which in this case I'm making out of the same cotton that I used to interline the trousers.

Here is the pocket, all finished. I know, I know, I didn't get any in-progress shots. Basically I took a large square of fabric, folded it in half, and then placed it on top of the trousers where I wanted the pocket to be. I then trimmed off the bit hanging over the waistband, and the bit hanging over the side seam. I stitched the side edge of the pocket to the side stay, then felled the pocket facings onto the pocket, from the inside. That was a little tricky for the top part, as you may be able to tell from the photo below. It wasn't perfect, but you'll never see. I felled the tops to the top of the waist stay, and tacked the corners so they don't pull free. Finally I trimmed the bottom of the pocket into a curve, backstitched along the seam, and hand-serged the raw edges.

Here's a shot from the outside. Notice the pick stitching along the front of the pocket opening. This secures the pocket facing from flapping backwards and pulling out of the pocket.

A closeup of one of the bar tacks. These are placed at the top and bottom of each pocket opening, and are used to keep the seams from being pulled open as your hands go in and out of the pocket.

All right - almost finished with the trousers! Now I just need to affix buttons for the braces, and line them, and they're done!
Tuesday, July 17, 2012
Day Trousers: Part 4 (fly and stays)
I know, I promised pockets next. I didn't realise there was so much more to do before getting to the pockets, so here's one more post before I get to them.
I took some photos outside instead of inside at my dark work table. Wow. The photos came out so much better. It's just so hot outside right now, so I may not take all my photos outside. Also, it's hard to stop work to take a photo and then come back inside to keep working.
Here is the button catch, with the buttonholes marked and basted, ready to cut.

The finished buttonholes (with bright colours!). This button catch is lined with linen, and has a layer of wool on each side to finish it. Some of the buttonholes are better than others.... I've also made the finished side of the buttonholes face to the outside, even though they'll usually (and hopefully always) be covered by the facing flap of the button catch, but just in case they show they'll look neat and tidy from the front.

Here's the finished and lined button fly. Note the difference between "button catch" and "button fly". I had trouble keeping the two apart, which led to a lot of reading and re-reading to make sure I was doing what was needed to the right side. I also referred to David Page Coffin's Trousers book to wrap my brain around button flies (flys?). Anyway, this is stayed with a triple layer of folded canvas to provide support for the buttons.

Here's a shot of some of the additional stay supports in the trousers. Across the top are the waist stays, which are actually several shorter lengths of canvas, overlapped at the side seams and at the split points at the back of the waistband. Down the side seam is another stay, which goes to just below the pocket opening, and keeps the pocket opening flat, and also gives the pocket bag itself something sturdy to fell onto (in the next post). Finally you can see the two round button stays for the suspenders/braces. In the rear there are triangular button stays which go up into the back split points.

The top of the trousers are cross stitched onto the waist stays. This seam will be covered eventually by the interior lining. Not shown, I pick stitched all around the waist stay to the front, about an inch from the top, to give the waist the support it derives from the stays.

I took some photos outside instead of inside at my dark work table. Wow. The photos came out so much better. It's just so hot outside right now, so I may not take all my photos outside. Also, it's hard to stop work to take a photo and then come back inside to keep working.
Here is the button catch, with the buttonholes marked and basted, ready to cut.

The finished buttonholes (with bright colours!). This button catch is lined with linen, and has a layer of wool on each side to finish it. Some of the buttonholes are better than others.... I've also made the finished side of the buttonholes face to the outside, even though they'll usually (and hopefully always) be covered by the facing flap of the button catch, but just in case they show they'll look neat and tidy from the front.

Here's the finished and lined button fly. Note the difference between "button catch" and "button fly". I had trouble keeping the two apart, which led to a lot of reading and re-reading to make sure I was doing what was needed to the right side. I also referred to David Page Coffin's Trousers book to wrap my brain around button flies (flys?). Anyway, this is stayed with a triple layer of folded canvas to provide support for the buttons.

Here's a shot of some of the additional stay supports in the trousers. Across the top are the waist stays, which are actually several shorter lengths of canvas, overlapped at the side seams and at the split points at the back of the waistband. Down the side seam is another stay, which goes to just below the pocket opening, and keeps the pocket opening flat, and also gives the pocket bag itself something sturdy to fell onto (in the next post). Finally you can see the two round button stays for the suspenders/braces. In the rear there are triangular button stays which go up into the back split points.
The top of the trousers are cross stitched onto the waist stays. This seam will be covered eventually by the interior lining. Not shown, I pick stitched all around the waist stay to the front, about an inch from the top, to give the waist the support it derives from the stays.

Saturday, June 30, 2012
Day Trousers: Part 3 (fly facings)
I have discovered that, despite what the home tailor does, there are two very different jobs in making men's clothing: the cutter and the tailor. The cutter does all the measuring, drafting, and cutting of the material, and the tailor does all the putting together.
The reason I've made this distinction is because in the book The Victorian Tailor, Jason Maclochlainn does his best to combine the two roles and describe them both, but honestly they are two huge (and vastly different) jobs, so some of both gets lost in the describing.
Don't get me wrong, he does a great job, but I think if I didn't have any sewing experience, or any other resources, I'd have a pretty hard time following along. I think another part of the problem is that the cutter is expected to just know how to draft and cut all the various things that go along with the base trouser pattern, such as the fly facings and linings, pocket facings, and so on. None of these are detailed in the book. I tried to look up how to put together the fly in W. D. F. Vincent's The Cutter's Practical Guide to the Cutting and Making all kinds of [sic] Trousers, Breeches & Knickers (Eighth Ed., 1898). No info at all on the cutting or making of the fly (or the pockets, which I'll post about next), other than to mention that the cutter must cut out all the facings and linings, and pass them along to the tailor. So that didn't help at all.
 I just bought David Page Coffin's Making Trousers, but for the pair of trousers I'm making now, I relied on this picture from The Victorian Tailor:
On it you can see the shape of the button catch and the pocket facings (under the hip stay). It looks almost as though the pocket facing has been clipped and turned, but the written directions have them remain right up to the seam, so I'm going to do that as well.
So let me post (finally) some pictures of what I've been up to.
Here is the fly stay. The X stitching is like cross stitching, except instead of stitching off to the side, I've just gone across the stay and made the next stitch there. Holds it in place, and doesn't show from the other side.

You can't see it yet, but I've sewn the fly lining onto the fly. This is mostly just to brag about my stitch count. :)
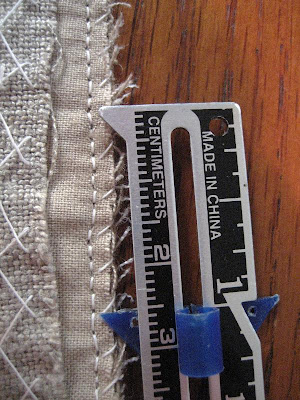
Now I've turned the lining over to cover the fly stay, and basted it in place. Eventually it'll get the button fly put over it.

Now to the other side, the button catch. I think I got the shape about right, based on the picture in the book. It goes all the way up to the top of the waistband, and is lined with a canvas stay.

Here's what it looks like from the front. I thought I'd figured out how to line up the plaid, but I guess not. Oh well, it won't show much once the fly is buttoned.

And now the two legs of the trousers are basted together, still inside out. At this point I can work on the pockets, which will be for the next post.

The reason I've made this distinction is because in the book The Victorian Tailor, Jason Maclochlainn does his best to combine the two roles and describe them both, but honestly they are two huge (and vastly different) jobs, so some of both gets lost in the describing.
Don't get me wrong, he does a great job, but I think if I didn't have any sewing experience, or any other resources, I'd have a pretty hard time following along. I think another part of the problem is that the cutter is expected to just know how to draft and cut all the various things that go along with the base trouser pattern, such as the fly facings and linings, pocket facings, and so on. None of these are detailed in the book. I tried to look up how to put together the fly in W. D. F. Vincent's The Cutter's Practical Guide to the Cutting and Making all kinds of [sic] Trousers, Breeches & Knickers (Eighth Ed., 1898). No info at all on the cutting or making of the fly (or the pockets, which I'll post about next), other than to mention that the cutter must cut out all the facings and linings, and pass them along to the tailor. So that didn't help at all.
 I just bought David Page Coffin's Making Trousers, but for the pair of trousers I'm making now, I relied on this picture from The Victorian Tailor:
On it you can see the shape of the button catch and the pocket facings (under the hip stay). It looks almost as though the pocket facing has been clipped and turned, but the written directions have them remain right up to the seam, so I'm going to do that as well.
So let me post (finally) some pictures of what I've been up to.
Here is the fly stay. The X stitching is like cross stitching, except instead of stitching off to the side, I've just gone across the stay and made the next stitch there. Holds it in place, and doesn't show from the other side.

You can't see it yet, but I've sewn the fly lining onto the fly. This is mostly just to brag about my stitch count. :)

Now I've turned the lining over to cover the fly stay, and basted it in place. Eventually it'll get the button fly put over it.

Now to the other side, the button catch. I think I got the shape about right, based on the picture in the book. It goes all the way up to the top of the waistband, and is lined with a canvas stay.

Here's what it looks like from the front. I thought I'd figured out how to line up the plaid, but I guess not. Oh well, it won't show much once the fly is buttoned.

And now the two legs of the trousers are basted together, still inside out. At this point I can work on the pockets, which will be for the next post.

Sunday, June 17, 2012
Day Trousers: Part 2 (interlining and stays)
After test-fitting my muslin, I cut out my wool fabric. Even though the muslin seemed to fit just fine I was going to add some insets (extra seam allowance) but I forgot to. Well, hope that works out for me.
I'd found a great wool fabric for a great price that I wanted to use for these trousers. The only problem was it was a modern suiting weight, and this sort of trousers should really be a bit heavier. I decided to interline the wool with cotton which will not only give it the drape that I want but also make them a little more comfortable to wear. Don't get me wrong - I wear wool trousers all the time and love them, but sometimes at the end of the day I take them off and just scratch my legs a bit.
Here I've basted the two layers along the centre line, and have begun to serge the edges together. Since I was planning on serging the edges of the wool anyway, this isn't really going to add any time to the process.

You can see the two layers. I think this is the best indication of the colour of the wool I chose. I tried to adjust the images but this one came out the best.

The next step was to prepare the canvas stays. You can see here that I had a few tries at drawing out the fork (crotch) stays.

And some more drawing of fork stays. In the end I actually ended up using one of the white chalk ones instead of my "final" decisive black chalk one.

I basted in the fork stay and then cross stitched it in place. I've also seen the term "catch stitch" for this. I'd worried about this when I decided to interline the trousers, but the lining made it a little more difficult to pick up a few threads of the wool with the cross stitch. If you're not familiar with this stitch, it shouldn't show at all on the right side of the fabric. I didn't get a picture, but I succeeded in catching a few threads of the weave from the back of the wool. I just had to jimmy the needle around a bit and try a few times on some of the stitches.

The fork line reinforced with another layer of linen canvas tape. I'm going to clip the notch in the middle of the tape, and this will hold it steady.

The pocket stay in place. Once again I cross stitched it along the inside edges, and basted it in place along the hem (raw) edge.

An extra piece of tape to reinforce the pocket opening. In retrospect I should have used a lighter weight of linen instead of this canvas. I hope it won't be too much fabric when I turn the hem in.

A close-up of the stay tape and the pocket stay. The basting is still in the stay tape, and I'll probably leave it in until I finish the trousers.

I'd found a great wool fabric for a great price that I wanted to use for these trousers. The only problem was it was a modern suiting weight, and this sort of trousers should really be a bit heavier. I decided to interline the wool with cotton which will not only give it the drape that I want but also make them a little more comfortable to wear. Don't get me wrong - I wear wool trousers all the time and love them, but sometimes at the end of the day I take them off and just scratch my legs a bit.
Here I've basted the two layers along the centre line, and have begun to serge the edges together. Since I was planning on serging the edges of the wool anyway, this isn't really going to add any time to the process.

You can see the two layers. I think this is the best indication of the colour of the wool I chose. I tried to adjust the images but this one came out the best.

The next step was to prepare the canvas stays. You can see here that I had a few tries at drawing out the fork (crotch) stays.

And some more drawing of fork stays. In the end I actually ended up using one of the white chalk ones instead of my "final" decisive black chalk one.

I basted in the fork stay and then cross stitched it in place. I've also seen the term "catch stitch" for this. I'd worried about this when I decided to interline the trousers, but the lining made it a little more difficult to pick up a few threads of the wool with the cross stitch. If you're not familiar with this stitch, it shouldn't show at all on the right side of the fabric. I didn't get a picture, but I succeeded in catching a few threads of the weave from the back of the wool. I just had to jimmy the needle around a bit and try a few times on some of the stitches.

The fork line reinforced with another layer of linen canvas tape. I'm going to clip the notch in the middle of the tape, and this will hold it steady.

The pocket stay in place. Once again I cross stitched it along the inside edges, and basted it in place along the hem (raw) edge.

An extra piece of tape to reinforce the pocket opening. In retrospect I should have used a lighter weight of linen instead of this canvas. I hope it won't be too much fabric when I turn the hem in.

A close-up of the stay tape and the pocket stay. The basting is still in the stay tape, and I'll probably leave it in until I finish the trousers.

Wednesday, June 13, 2012
Day Trousers: Part 1 (the draft)
I just started sewing in earnest about two years ago. I've never been afraid of sewing, but I dove into it for my wedding, and by following the directions that came with the various patterns I used I was able to make not only shirts and trousers for myself, but also a frock coat for myself, and my wife's wedding ensemble, including a Victorian riding jacket with boning. I'll tell you, her jacket came out a lot better than my frock coat, but I'd made mine first and learned a lot.
That's just to say that I'm pretty much not afraid of any pattern I can get my hands on. I'm good at reading and following directions, and I have a good spacial sense so I can envision how fabric will end up after being turned inside out and backwards (like collars and welt pockets). The next step is to learn to draft my own patterns. That way I can make anything, and I'll know it will fit!
 With that goal in mind I found a book that could have been written just for me: The Victorian Tailor: An Introduction to Period Tailoring, by Jason Maclochlainn. It walks you through the changes in fashion through the various decades of Queen Victoria's reign, details fabrics which were used in making the clothing, teaches you the tools of the time and how to sew various stitches necessary to make the clothes, and then finally tells how to measure and scale your measurements, and how to draft a variety of styles of trousers, waistcoats and coats.
Well. I followed the directions for drafting a general style of trousers (this one isn't given a place in time or style, but there are other patterns for trousers including 1850 pants, shooting breeches, 1868 dress pants, 1870s American pants, 1870s morning pants, and an entire lounge suit). However, the directions for drafting the pattern don't include how to draft a fly or the fly button catch, and of all of the trousers I just listed, only the lounge suit includes those pieces in its pattern. I guess I'll have to use that as a base for these trousers. Also, even though I said above I have good spacial sense, I got a little lost toward the end of drafting my pattern. Apparently the book was supposed to be twice as long, and the publisher had it edited down to its present size, which could account for why some of the directions are extremely detailed, and why other bits aren't there at all. Certainly I can figure out on my own how to make a fly covering, especially as there are details on the fly lining.
Having said all that, here are pictures of my draft. I basted them together, and they seem to fit fine, despite my kind of mangling the seat portion of the rear pattern.


Thursday, June 7, 2012
Victorian Shirt: Part 7 (collar and cuffs 4)
 Nearly there!
I drafted a pattern for the cuffs based on #1 of the cuff designs to the right. I wasn't sure why it has the stitches around the centre, however. Was it made in two halves and assembled? That's what it looks like, with the seam stitched, and then a row of topstitching on either side. Well, I made my cuffs as one piece, but added a row of stitching around the centre in any case, figuring it will help keep it from stretching out of shape. Maybe by making the cuffs in two pieces helped use up smaller pieces of cloth the shirt makers had lying around.
I added a quarter inch seam allowance to my pattern, and prepared to sew it. Like the collar I used two layers of fine linen for the outer pieces, and a slightly heavier linen for the interlining, in order to absorb more starch and keep it stiff.

Here's a cuff with the centre stitching completed, and prick stitched around the outer edge. I've punched holes for the buttonholes, but haven't cut the slits yet. I'm going to baste the layers together first so they don't move around once I cut the slits.

Here's the basting, and the slits cut. Once again I used a half-inch chisel to cut the slits, including the diameter of the punched hole in the length.

The cuff fastened on the sleeve. The top stud is a button stud, which goes through all four layers: the two cuff band layers of the sleeve and the two layers of the cuff itself. That holds it onto the sleeve. The bottom stud is actually a collar stud until I get some button links that I want to use. I could use cufflinks, but the links with the swivel foldy bit (technical, I know) aren't period correct for a Victorian shirt. Button links are two shank buttons connected by a little loop of metal - basically just a double-headed button.

The view of the cuff most people will see. Well, they'll only see an inch or so peeking out from beneath a coat. That's the hard part of spending so much time on a shirt - people will only see a little flash of white, and the rest is always hidden. Oh well, I'll know (and so will all of you, having seen the whole process).

The last step is to wash out the chalk marks and starch and press the collar and cuffs. Then it's on to the next project!
Subscribe to:
Posts (Atom)